
This small bathroom makeover I’ve been working on for the past month is officially done, and today I’m excited to share the finished project! I want to extend a huge thank you to Lowe’s Home Improvement for sponsoring this makeover story.


The Before and After
To jog your memory, here’s a look at the before. While this bathroom wasn’t overly dated, ugly or in need of a total gut job, it lacked style and personality. Like many builder grade bathrooms it just felt a little basic, and I wanted to infuse this small space with some custom upgrades.

This small bathroom is connected to the largest extra bedroom in the house (which is currently my teenage son’s room). Here’s a peak at his room, and you can find more pictures, details as well as the before and afters of this space in this post here.

My overall goal with this bathroom makeover was to outfit this bathroom with custom details that would help to make this bathroom and its adjoining bedroom feel more like a second master suite. Not because I’m trying to keep my son from ever wanting to leave home 😉 , but because I know that giving this bathroom a little love will make the space more attractive to potential home buyers. On top of that, using materials that would help to make this space appear larger and brighter (being that this bathroom has no windows) was also pretty high on my makeover priority list.
The biggest, eye-catching, bang-for-the-buck change made in the space is hands down the herringbone tile floor.

It’s the only change made in here that I didn’t DIY. However, even having hired out for this floor project I was still able to stay under my overall budget for the space. You can find more details on this tile floor in this post here. Suffice to say I’m pleased as pie with the way it turned out, and the dark floor did exactly what I was hoping it would for the space. It made the bathroom feel larger which scores major bonus points with in a room with such a small footprint.


The DIY Rundown
I diy’ed everything else. And the honest to goodness truth is, if I can do it; anyone can!
1. Adding subway tile from the vanity all the way around the shower stall really opened up the whole space. It seems like a lot of tile, but because I tiled around the mirror rather than removing it, I really didn’t need much in the way of material. So while it took a decent chunk of my time to do this wall tile project, it really didn’t cost that much. Honestly, there are some wallpapers that would have cost more. And while this was more expensive than just painting, the end result is so much more custom looking than paint would have been. These pictures don’t do this tile justice as it’s hard to tell just how much this tile reflects light back into the space, but it really does bounce light around the room making this small, windowless bathroom feel so much larger and brighter. Going with white grout allows the tile to add subtle pattern to the walls keeping it from competing with the floor all the while drawing the eye up around the shower making the walls feel taller.


2. Framing out the mirror rather than replacing it was an easy, and more budget friendly way to give the mirror more of a finished look. Using lattice board moulding, I didn’t even bother mitering the corners. Choosing instead to go with simple straight cuts made this project simple and easy. I attached the boards to the mirror using Liquid Nails, keeping the boards in place with painter’s tape until the adhesive was dry.

3. With that same inexpensive lattice board moulding I added a board and batten wall treatment to the other side of the bathroom to balance the tiled walls. You might remember I added this same style of wall treatment to the headboard wall in the adjoining bedroom, so this added detail really helps to tie the two spaces together nicely.

4. The old faucet wasn’t necessarily ugly or outdated, and yes it was even chrome so it “matched” this bathroom. But it really just wasn’t the style that I was wanting for this space. I wanted something more modern to balance out all of the classic details. I think you can mix styles more easily when you’re working within the same metal profile. So I let the old faucet go to someone who appreciates its style (thank goodness for Facebook Marketplace!), and I brought in this pretty modern beauty which better suits my own.
Replacing a faucet is actually a pretty simple and straightforward DIY project. You can find an easy to follow step-by-step video tutorial right here on Lowe’s Home Improvement’s website.

5. A shower head is often an overlooked upgrade. More often than not, especially in a shower stall where there’s a curtain, people don’t think to replace their shower head. But it’s such a simple and easy way to add a custom detail to a bathroom space, even if it’s one that only you or whoever is using the shower will appreciate. Replacing a shower head is about as simple as screwing in a light bulb, and it’s not a very expensive change to make either.

6. Lastly, I switched out the small cabinet knobs for these extra large matte black cabinet pulls. And I’m in love! This is actually one of my favorite changes in the whole bathroom. It’s amazing how much of an impact cabinet hardware makes in a space.

The Decor Details
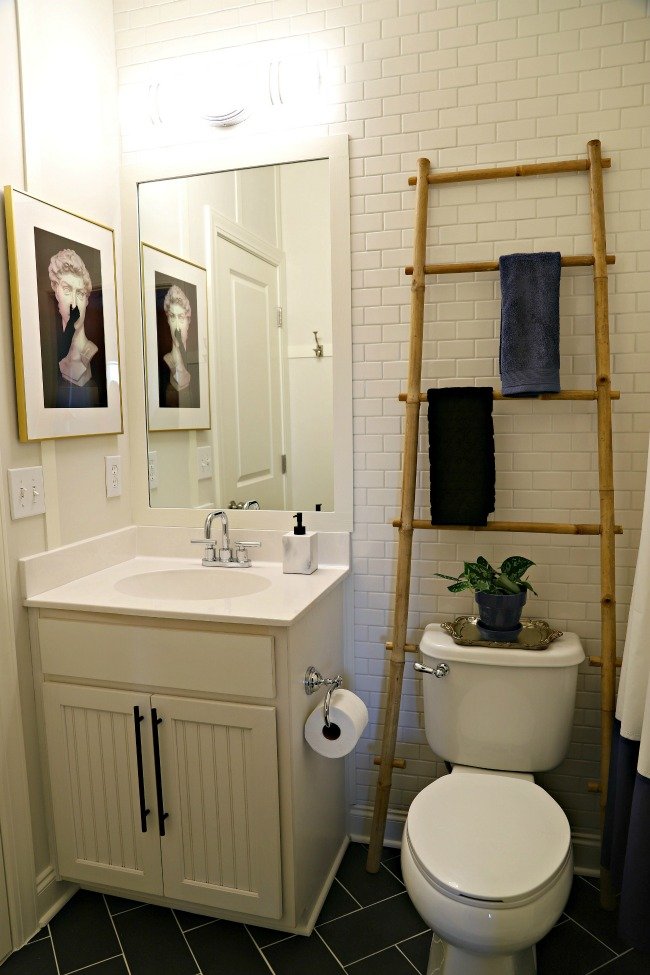
Not wanting to overwhelm this small space with too many accessories, I kept the decor pretty simple. Bringing in a bamboo ladder over the commode (as I did in our powder room) to house hand towels, added warmth and texture to this bathroom. I love it when form meets function.


And no space is complete without art. I fell in love with the classic yet quirky vibe of this print.

The Full Makeover Story
Watch this video for a full play by play of this makeover project where I share even more details.
The Sources

Wall Color – HGTV Home by Sherwin Williams Aesthetic White ( a really, really light greyish white that matches and flows with the tile color really nicely)
Ladder – Sourced at a local home decor shop called Celadon – here’s a similar one.
*This post was sponsored by Lowe’s Home Improvement. All opinions and thoughts are 100% genuine.


